Modular
Unlike all other Page Templates which create standalone pages that can each be visited at a specific URL (ex:yoursite.com/myabout-us), a Modular Page is a collection of pages stacked on top of each other to create a unified, single page. This lets you create a complex page-structure by using the LEGO building-brick approach.
Since we Modular Pages are all displayed at once, their Page Title is never displayed: its only used for easier management in the Admin.
All of our sites use Modular Pages for their Home Page. Depending on your Theme, the date at which your site was built and the optional packages you've purchased, your Home Page may or may not support these Modular Templates.
Hero
The Modular/Hero Template is a simple, single-column, full-width layout that displays Markdown and a Button over an image or color background.
Background Image Behaviour
The Background Image will always override the Background Color, so be sure to delete the value in the Background Image field if you would like to use a color instead. The Background Color dropdown allows you to choose from the colors used in your theme. Also, if no Background Image or Background Color is defined, the Template will use the Header Image defined in Configuration > Site.

In order to make changes to your Hero, use the Markdown Editor and the Background Settings and Buttons sections at the bottom of the Content Tab.
Services
The Modular/Services Template is a two-column layout that displays a title, a short piece of copy, and a button in one column and a related image in the other. As new services are added, the Image and Text columns alternate automatically. Although we primarily use this Modular Template for listing Services offered (Property Management or Real Estate for example), there's nothing stopping you from using it to display other content in this format.

In order to make changes to your Services, use the new Services section at the bottom of the Content tab.
- From the Pages tab, click on the Modular Services Page you would like to modify.
- Click on the Content tab if its not already selected.
- Scroll down to Services.
To modify or rearrange an existing Service:
- Reorder them by dragging the Service from the ☰ handle on the left.
- Click on in the top-right to expand the Service and edit the its info.
- Click on to delete the Service.
- Click the Save button in the top-right corner of the page to save your changes.
To add a new Service:
- Drag-and-Drop an image (or click) on the area beneath Page Media to upload an image.
- Scroll to the bottom of the list and click the +Add Item button.
- Add a Title for your Service.
- Use the dropdown to choose an image from your Page Media.
- In the Text section, enter a description of your Service in Markdown.
- Use Button Text and Button Link to link to the appropriate Page.
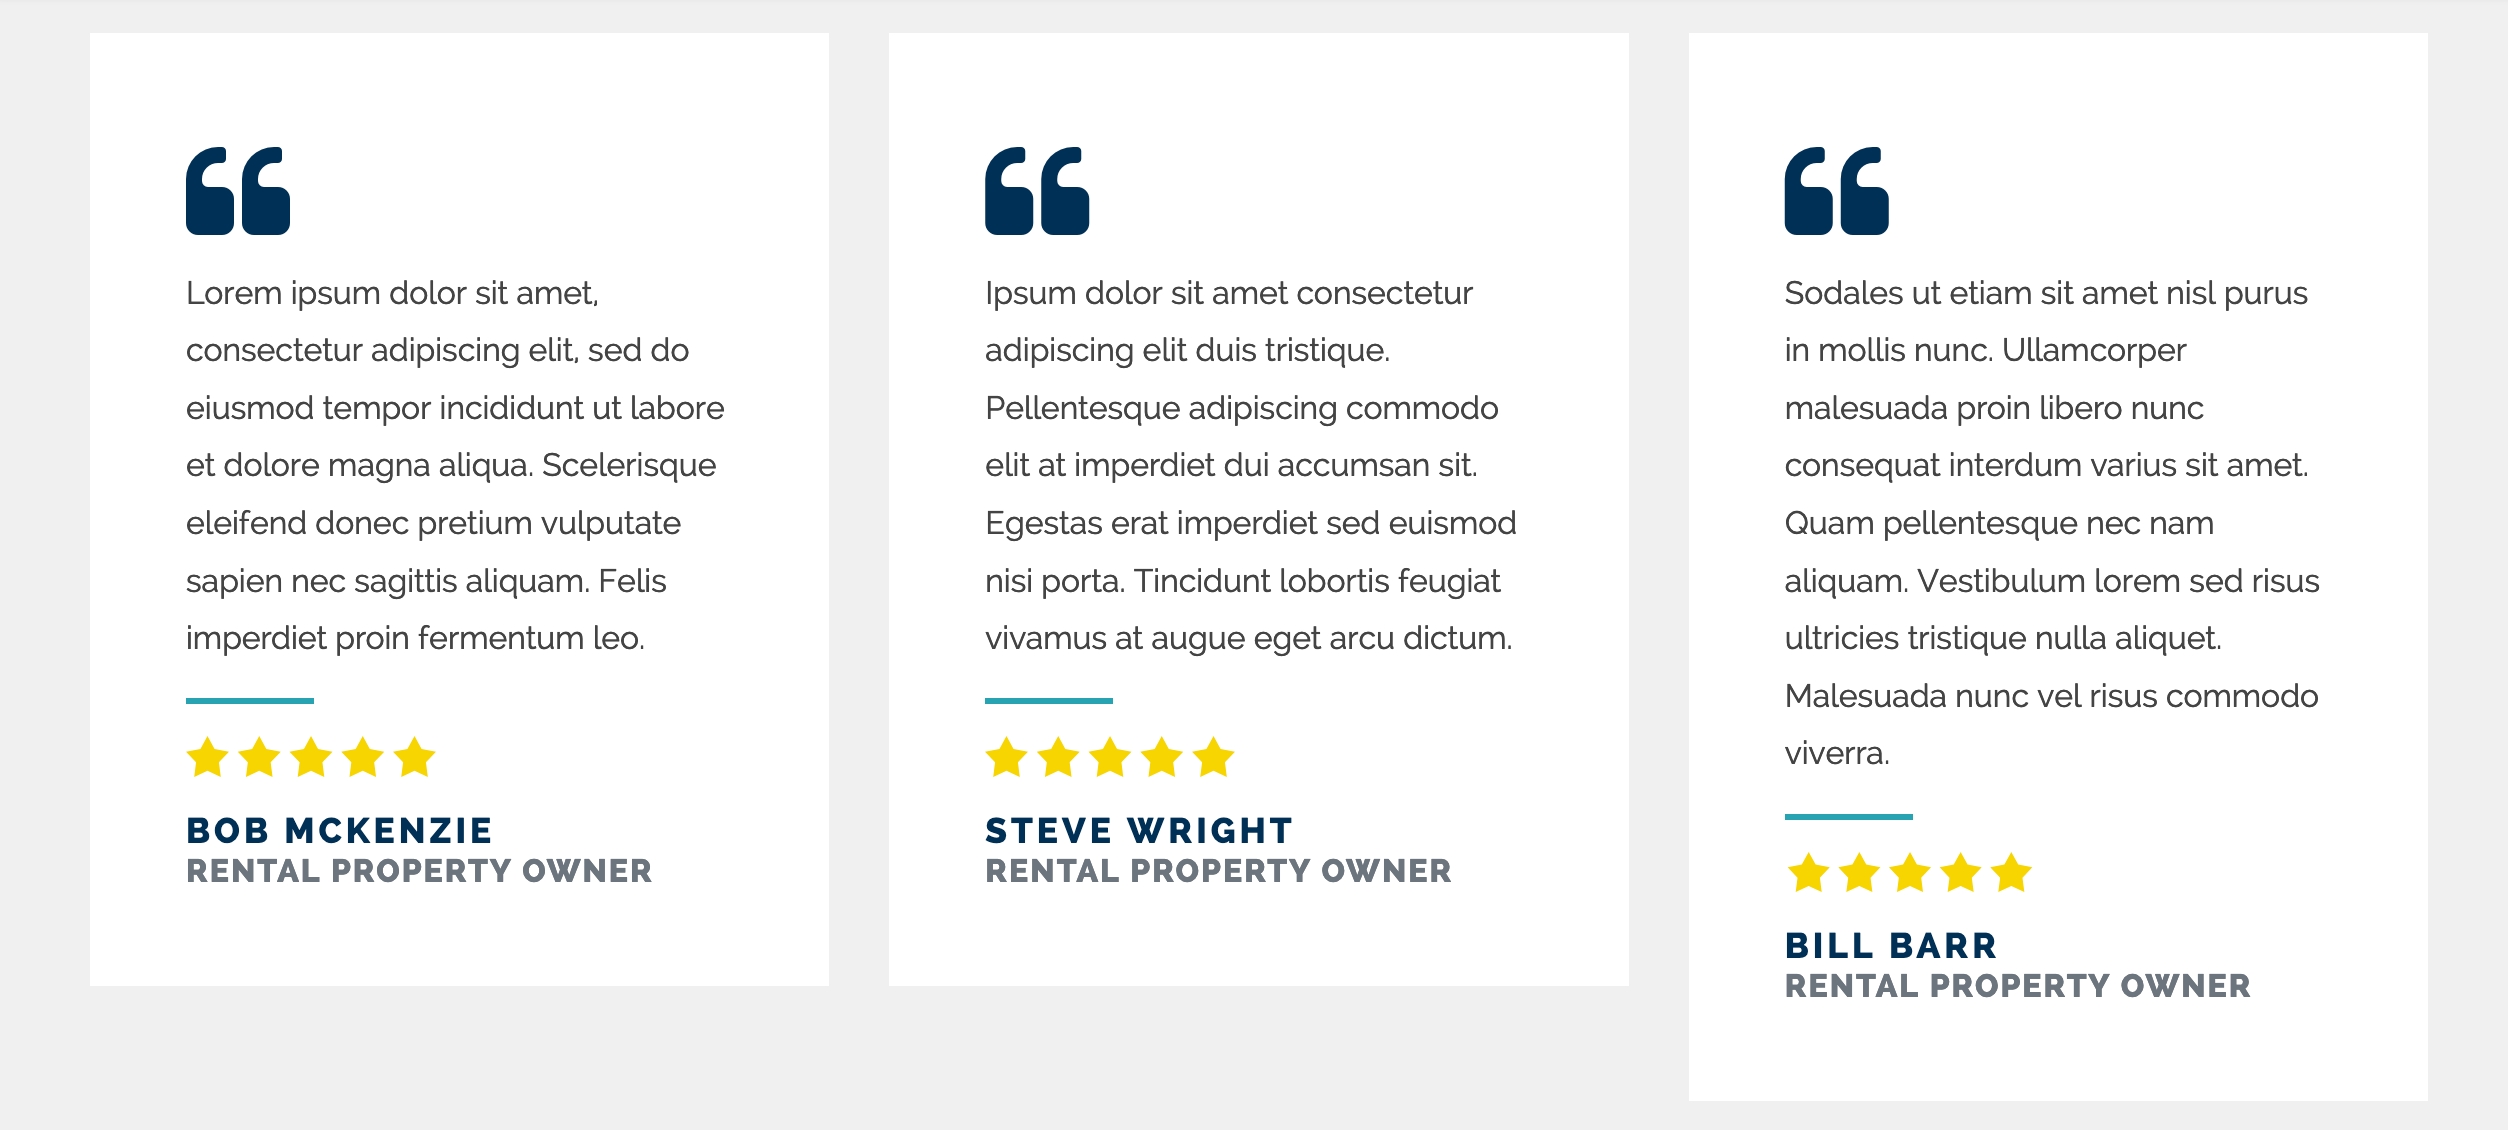
Testimonials
As the name suggests the Modular/Testimonials Template is designed to display Client Testimonials on a page. Keep in mind that this is different than the standard Testimonials, which lists Testimonials on a stand-alone page. You can enter a maximum of 3 Testimonials per Page, but some themes may only display one at a time.
- From the Pages tab, click on the Modular Testimonials Page you would like to modify.
- Click on the Content tab if its not already selected.
- Scroll down to Testimonials.
To modify or rearrange an existing testimonials:
- Reorder them by dragging the Testimonial form the ☰ handle on the left.
- Click on in the top-right to expand the testimonial and edit it.
- Click on to delete the question.
- Click the Save button in the top-right corner of the page to save your changes.
To add a new testimonial, up to a maximum 3:
- Scroll to the bottom of the list and click +Add Item
- Add the client's quote to the Quote field.
- Add the client's name to the Author field.
- Add a description of the client to the Author's Title field (ex: Rental Property Owner).
- Click the Save button in the top-right corner of the page to save your changes.
Boxes
The Modular/Boxes Template display three distinct boxes that "float" on the background of the preceding Module. Because of the particular styling of this template, it should only be used following a Page using a Modular/Hero Template. You may also need to increase the bottom padding of the preceding section by assigning a class of pb-5.

- From the Pages tab, click on the Modular Boxes Page you would like to modify.
- Click on the Content tab if its not already selected.
- Scroll down to Boxes.
To modify or rearrange an existing Box:
- Reorder them by dragging the Box form the ☰ handle on the left.
- Click on in the top-right to expand the Box and edit it.
- Click on to delete the Box.
- Click the Save button in the top-right corner of the page to save your changes.
To add a new Box, up to a maximum 3:
- Scroll to the bottom of the list and click +Add Item
- Add a value to Title field.
- Add a value to the Box Text field.
- Choose a Page to link to in the Page Link dropdown.
- Choose an icon to display above the Title from the dropdown.
- Click the Save button in the top-right corner of the page to save your changes.
Logos
The Modular/Logos Template is a simple template used to display a list of logos (or other small images).

- From the Pages tab, click on the Modular Logos Page you would like to modify.
- Click on the Content tab if its not already selected.
To add a new Logo:
- Drag-and-Drop an image (or click) on the area beneath Page Media to upload an image.
- Wait for a blue will appear telling you the upload is complete.
- Click the Save button in the top-right corner of the page to save your changes.
To rearrange or remove a Logo:
- Reorder them by click-and-holding the images like you would a folder on your desktop.
- Click on to delete the Logo.
- Click the Save button in the top-right corner of the page to save your changes.
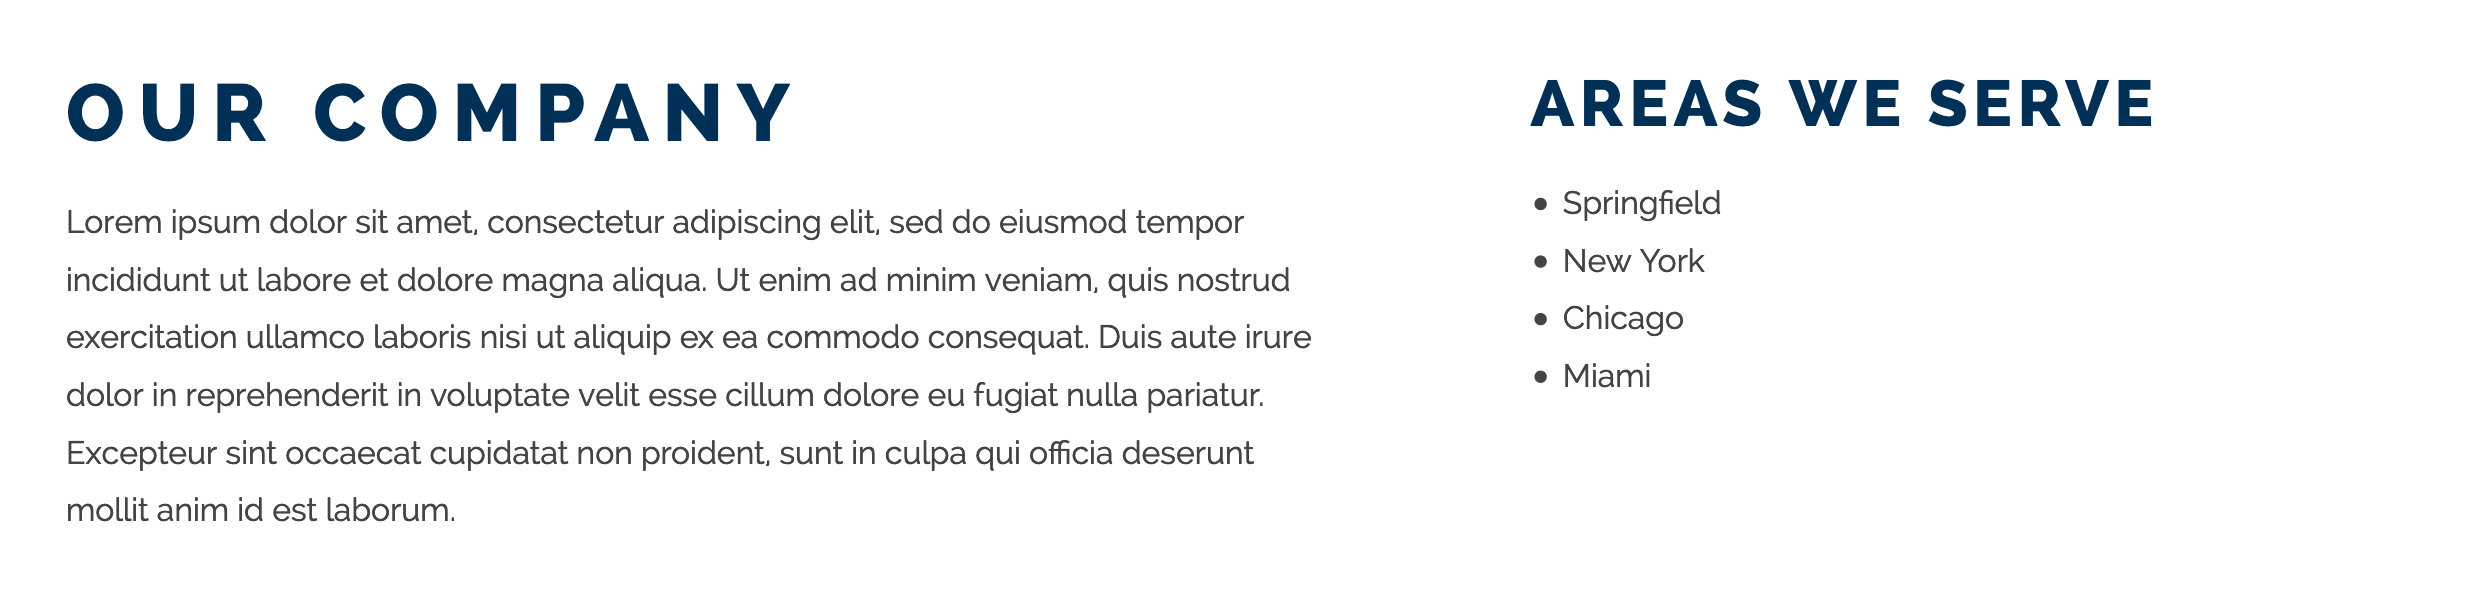
Company
The Modular/Company Template is a two-column layout with two functions. On the left, you have a short description of your company and the services it offers. To the right you have a list of Areas Served as well as links to the pages dedicated to each of those areas. These Areas and links are then reused throughout the site in order to minimize the duplicate work and human error.
- From the Pages tab, click on the Modular Company Page you would like to modify.
- Click on the Content tab if its not already selected.
- Modify your company's description in the Markdown Editor.
- Scroll down to Areas We Serve.
To modify or rearrange an existing Box:
- Reorder them by dragging the Box form the ☰ handle on the left.
- Click on in the top-right to expand the Area and edit it.
- Click on to delete the Box.
- Select a page from the Area Page dropdown to link to your location page.
- Click the Save button in the top-right corner of the page to save your changes.
To add a new Area:
- Scroll to the bottom of the list and click +Add Item
- Add a value to Area Name field.
- Optionally, choose a Page to link to in the Area Page dropdown.
- Click the Save button in the top-right corner of the page to save your changes.